
Bike Riding Should Not Be Painful!
One of the most common things I hear when people hear I’m a cyclist is “Oh I love bikes, but it hurts my butt too much.” And let me tell you, your pain is real. And valid! And there’s ways to make it better!
Honestly, no matter how much you love your bike saddle or how perfectly your bike fits, it’s never going to feel like a couch. In fact, it shouldn’t. But it also shouldn’t be painful, or cause pain after you get off your bike. Read on for tips and advice to make your bike ride less painful!
There are most definitely affiliate links in the content below. When you click on them and make a purchase (which I hope you will), I get a small cut, which helps me do this work! If you want to read more about how I use Affiliate links, please go here.
One of the most common things I hear when people hear I’m a cyclist is “Oh I love bikes, but it hurts my butt too much.” And let me tell you, your pain is real. And valid! And there’s ways to make it better!
Honestly, no matter how much you love your bike saddle or how perfectly your bike fits, it’s never going to feel like a couch. In fact, it shouldn’t. But it also shouldn’t be painful, or cause pain after you get off your bike. On a scale of 1-10, your bike should never cause you more pain than a 3 or 4, in my opinion.
So, how in the world do you make that happen? Read on for my advice for avoiding pain on the bike, the best saddles for bigger and heavier riders, and some troubleshooting tips.
How To Avoid Pain on Your Bike
Whether you’re riding around the block or twenty miles, you should not be in pain while riding your bike (unless maybe you’re going up a giant hill and it’s supposed to be hard.) No, I’m talking about pins and needle pain in your hands, numb feet, tingly bottoms - all of that is a sure sign that something is wrong. Below are a few suggestions to try - but before you go changing anything, ONLY MAKE ONE MODIFICATION AT A TIME.
Seriously, don’t change everything at once, because it’s likely that you’ll need to keep making adjustments to get the fit exactly right. If you change everything at once, you might not be able to get things back to where they were at. Patience is your friend when dialing in your bike.
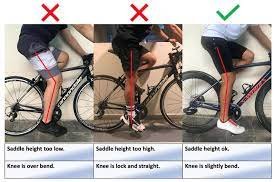
Check your saddle height.
One of the most common mistakes I see are saddles that are too high or too low. Too high and you’re going to hurt your knees, back or achilles tendon. Too low, and you’ll also hurt your knees and potentially your hips, back, and who knows what else!
When your legs are at the bottom of the petal stroke, your leg should be extended about 90% of the way. Further than that and you risk over-extending your knee, much shorter, and you’ll have both an inefficient pedal stroke and put unnecessary pressure on your knees.
Modify your points of contact
Our bodies have 3 points of contact on the bike - hands, feet and saddle. All of these components can be changed out - some easy swaps can be done at home, some you’ll need a professional mechanic.
Handlebar grips are an easy swap to make at home and there are a lot of different choices - foam grips, ergonomic grips, leather, everything in between. You can also swap out your entire handlebar, but I recommend working with a mechanic on this project to ensure everything will work together correctly.
Pedals are also a relatively easy swap you can make at home. If you’re having foot pain, you could consider a wider, flat pedal or one with adjustable pins that can be dialed in or out. Often times, foot pain doesn’t originate at your feet (usually an issue somewhere else on your bike) so pedal choice is often more related to aesthetics or function that pain relief, but it’s still worth considering.
Saddles are an entire ecosystem into themselves, as you can modify the height, angle, and position. I’d highly recommend working with a trusted bike fitter or mechanic when making adjustments on your saddle.
Read this post for my favorite saddles, and things to consider when choosing a saddle. Overall, I try and avoid gel covers/seat covers in general and instead swap out the entire seat, as the extra cushioning can actually cause more chafing/movement.
Stand up or Shift Your Body Weight Occassionally
Anytime you sit in one position for too long, your body is going to hurt. I don’t care if you’re in the world’s most comfortable chair, every once in a while, you gotta move your body!
The same is true on a bike. Practice standing up, stretching while riding, and shifting your body weight. I try and do this every 10 minutes or so, always returning to a neutral riding position before pedaling again.
I also recommend standing up over super bumpy or rough areas, and taking a couple minutes to stretch while waiting at red lights or during a water break. My friend Kelli wrote an amazing book called “Pedal, Stretch, Breathe - The Yoga of Bicycling”, which has some excellent recommendations for on the bike stretching!
The Best Bike Saddles for Heavier Riders
Everybody has an opinion on bike saddles. Some people like super hard, stiff saddles while others like soft, leather saddles. There are squishy saddles, vegan saddles, saddles with holes, and saddles with supposed antibacterial qualities. Honestly, the choices are both endless and overwhelming.
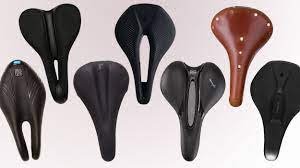
So many types of saddles.
I’ve ridden a lot of bike saddles in my day and am not shy about sharing my opinion. One of my most popular blog posts to this day is a review of a saddle (that I was not very favorable to…) so when I tell you I like these saddles below, you can trust me.
Before we get into saddles, you need to know that even though you have a big butt (or wide hips), or are a larger bodied person, THIS DOES NOT MEAN YOU NEED A HUGE SADDLE! When you’re on the bike, the majority of your weight should be resting on your sit bones (technically the ischial tuberosity bones.) These are the protruding little bones at the bottom of your pelvis and they’re designed to support your weight!
When you’re on your bike saddle, you should be sitting on the bony part of your butt! I like to wiggle my butt into position, which helps get all the extra fleshy bits out of the way too!
Ok, now onto saddles!
I’ve also got this ENTIRE post about saddles if you want more recommendations, especially for indoor riding!
When You’ve Tried Everything Else
Sometimes even after you go through all of the modifications i’ve listed above, you still might be in pain. At this point, you need a professional bike fit. I recommend asking at your local bike shop who they recommend for this service. Note that it will not be cheap (likely a few hundred dollars) but it will customize your bike exactly to your needs, and if you plan to spend a lot of time riding, it’s definitely worth the investment.

The Best Bike Seat for Heavy Riders - Updated July 2024
Looking for a more comfortable seat for your bicycle? I’ve got you covered! From indoor riding to tricycles to long distance touring, I’ve rounded up my favorite saddles for heavier riders in one place. Every saddle listed has a weight limit of 300+ pounds, with a few with a limit of over 600 pounds.
This post contains affiliate links. When you purchase something using one of these links, I get a small commission of that purchase (from the retailer, not you!) which lets me keep making content like this! To learn more about my use of affiliate links, please click here.
Edit: Updated July 2024 with two new seats that have a weight limit over 500 lbs!
I’m going to admit something here - I think I’ve given bad advice in the past. Well, maybe not bad advice, but not fully inclusive. I think I’ve been a bit narrow-minded in my approach to bike seats.
If you’ve followed my adventures, you know that I’m an endurance rider. It’s not a big deal for me to go for 50+ mile days or consider spending 8 hours on my bike at one time. My recommendations have often reflected this and I’m realizing that those might not be the most appropriate for many folks just getting into cycling.
In fact, for a lot of my readers who are just getting into bikes (or back on them) or who only intend to ride recreationally, I’ve neglected to provide good recommendations for you...So let’s fix that!
As a gentle reminder, just because you’ve got a big booty, DOES NOT mean you need a bigger seat! It’s all about supporting your sit bones (technically your ischial tuberosity, which is the lower part of your pelvis.)
This drawing does a good job showing the bones we want to be supported - and again - just because we’re fat, doesn’t mean we have super-wide sit bones!

Bike Seats for Recreational Riding / Shorter Trips
All of these seats have a weight limit of 300 lbs or more!
Oversized Bike Seat for Men & Women Comfort - Weight limit of 600 pounds!

This seat had the second highest weight limit I could find, at 600 pounds. A bargain at $39.99, this seat should work well for shorter distance riding on an upright bike or trike.

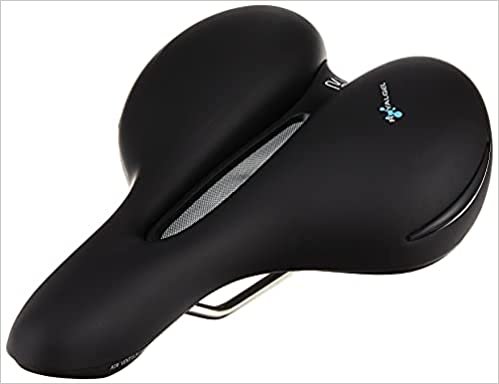
This saddle has some nice anatomic features and has a comfortable (but not too cushy) gel padding that provides nice support. Another cool (but often overlooked feature) is the “cooling fabric” which supposedly keeps the saddle from heating up in the sun. I haven’t tested this feature personally, but the reviews seem promising! Buy on Amazon.
Selle Royal Respiro Men’s Soft Moderate Cool Xsenium Bicycle Saddle - $62.65
Similar to the women’s version, but with a bit different geometry for our different nether region needs, this saddle has the same features as the women’s version. Buy here.
IPOW Comfort Bike Seat for Women or Men - $19.99
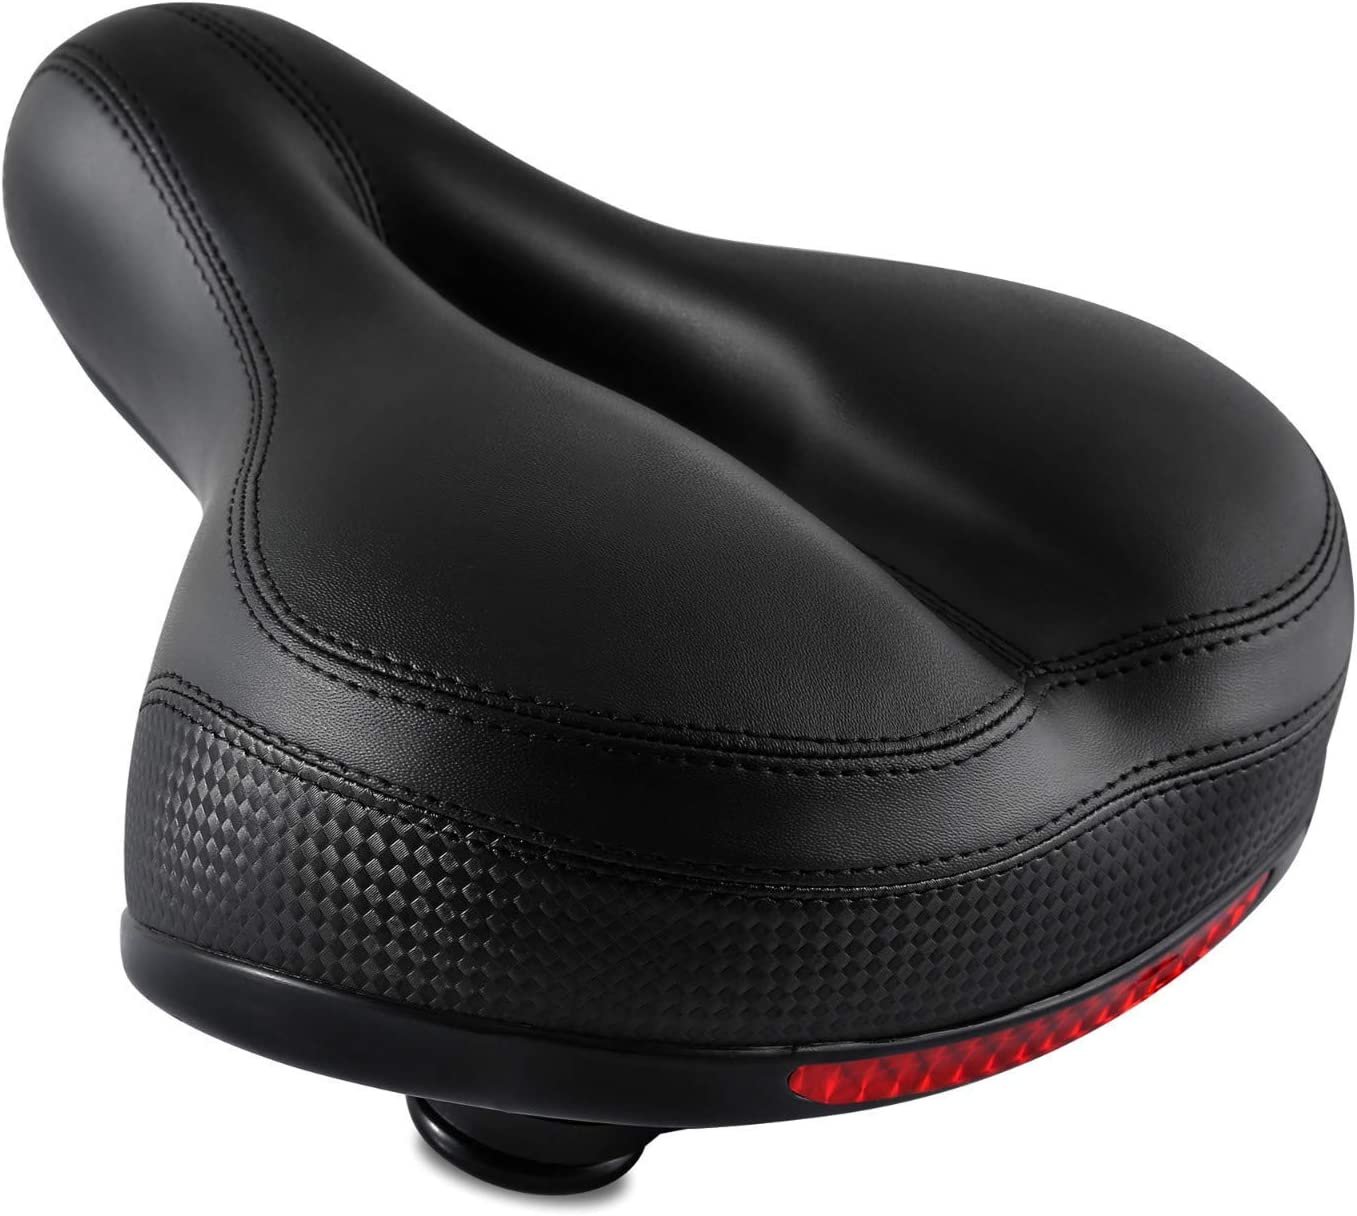
This seat is pretty different from what I typically recommend, but it has over 4000 glowing reviews on Amazon, so something must be nice about it. At $19.99, you can’t really go wrong either. Ergonomic features, a cutout for breathability, springs for shock absorption, and a reflective feature in the rear. Buy here.
YLG Oversized Bike Seat for Outdoors Use -$39.97
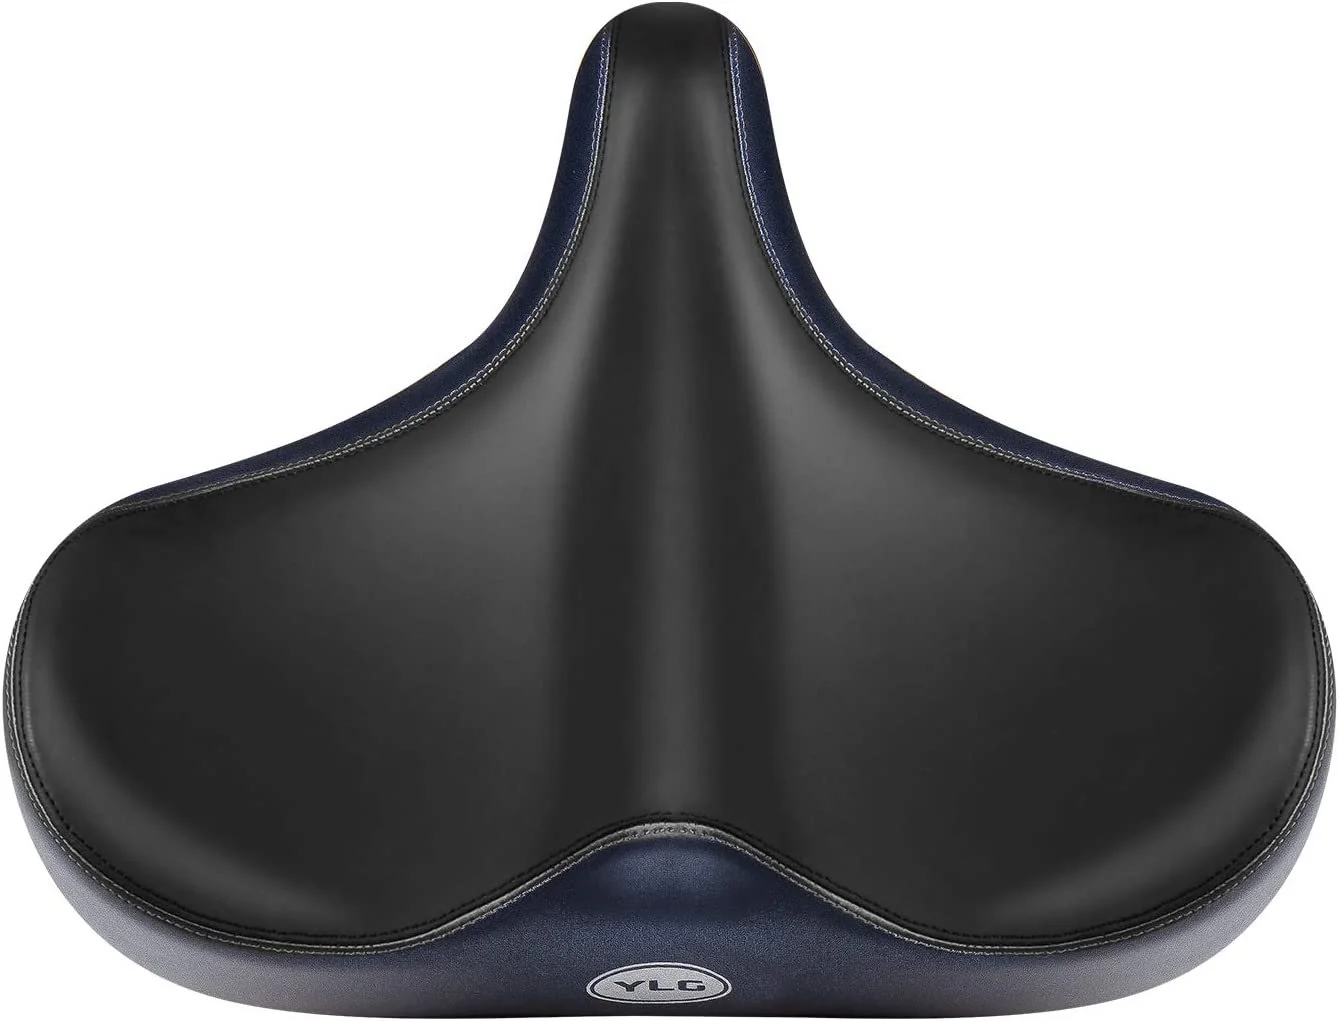
This saddle is a big departure from my typical recommendations, but again, I’ve heard nothing but glowing reviews. Much wider and fully supportive of your hips, this saddle is a very different design. This seat is ideal for very upright bicycles or tricycles. Buy here.
Bike Seats for Indoor Cycling
Do you enjoy riding a stationary bike inside but find that your butt is killing you? Me too actually - I’ve found that riding inside hurts SO MUCH MORE than riding outside. My theory is that when we’re outside, we’re constantly shifting our weight when we stop or start, look around, or change speed. When we ride inside, however, our bodies stay in one place much longer, so having a supportive seat is crucial!
Here are my favorites for people living in larger bodies:
YLG Oversized Bike Seat for Indoor Use - $39.99
This is the same saddle as my recommendation for outdoor riding, but this one is specifically for indoors. The primary difference is the cover material is different for indoors than outdoors, but realistically, either model would work for indoors or outdoors. Buy here.
DAWAY Oversized Comfort Bike Seat - $41.99
This saddle has the highest weight limit I could find at 550 lbs and I’ve seen a million fat influencers rave about it. Apparently it’s THE BEST for the Peloton but I can neither confirm nor deny that as I’ve never used a Peloton :) This saddle has memory foam and is water resistant, so it would also work for outdoor riding! Buy here.
Bike Seats for Endurance, Bike Touring & Road Riding
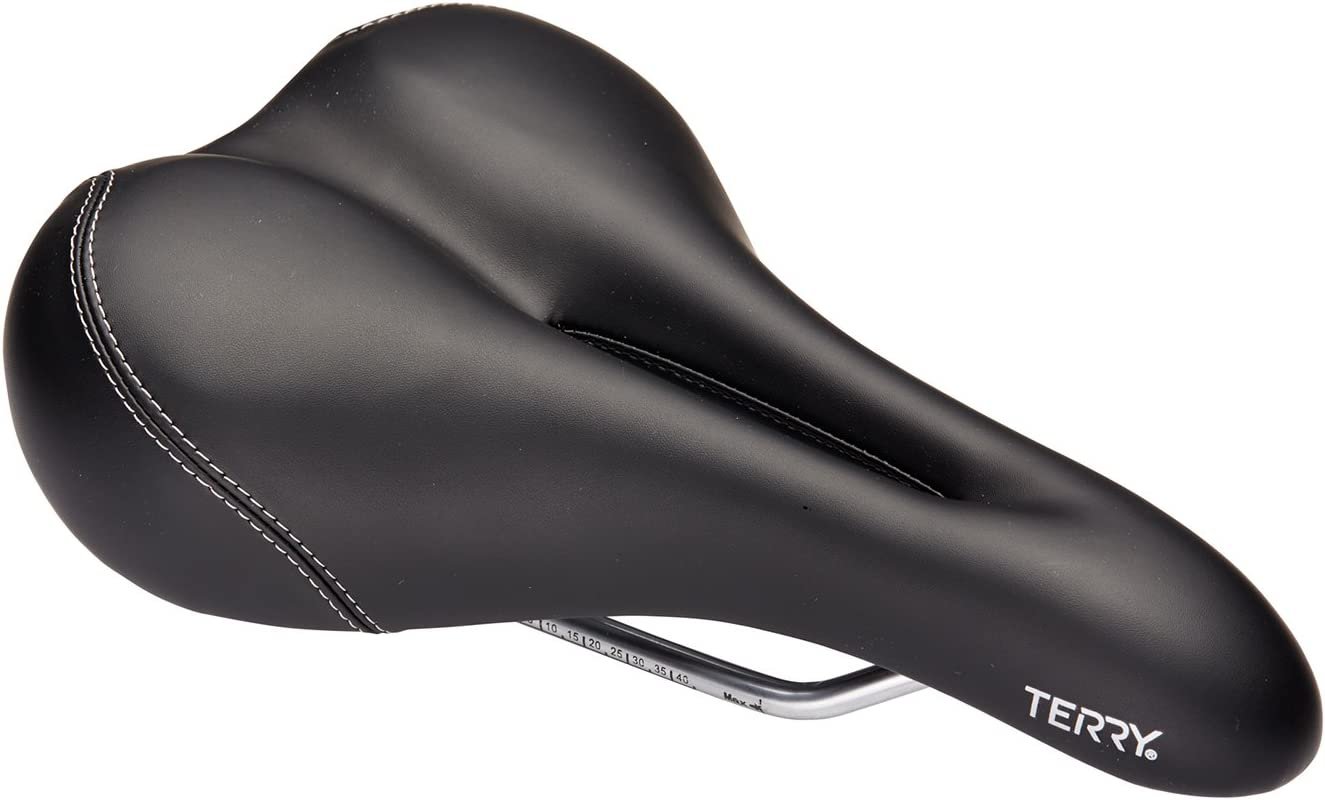
Terry Liberator X Gel - $82.95
This is my go-to all time favorite seat. Firm but not too squishy with padding in just the right places. The cut out in the saddle is great for all sorts of anatomy too. Buy here.
Brooks B-17 and B-17S $104-125 (price varies)
People either love or hate Brooks Saddles. I love them, but admit that they do take a bit to get used to. If you’re able to find one, I especially recommend the B-17S, which has a shorter nose. Buy here.
WTB Volt - $47.95
With steel rails and firm padding, this no-frills saddle is a good bet for many body types. I use this on my gravel bike and cyclocross bike and am very happy. Buy here.
The Tool You Need to Change Your Bike Seat
Each seat post and setup is a little different, but there’s one (nearly) universal tool that will work regardless what setup you’ve got. A bicycle multi-tool!
This is actually a very handy tool for every person who rides a bike to have (and to carry on every single ride.) Most multi-tools have a size range of allen wrenches (or hex key), a flat head and Phillips head screw driver, and a few other helpful tools.
I love this one from Crank Brothers - it’s $19.99, fits in nearly any bag at 3.5” long, and I never leave home without it. It will almost definitely have the tool you need to change your bike seat.
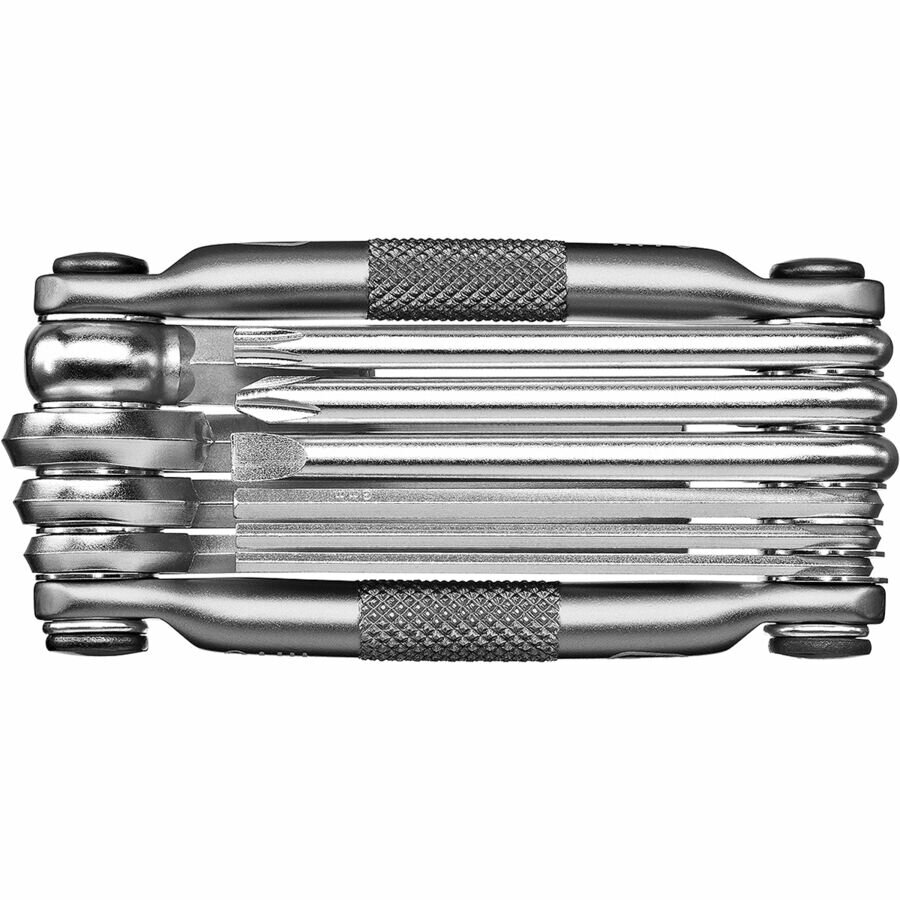
Crank Brothers Multi Tool
Be the hero for all your friends on your rides. Every tool you need.
How to Bike Commute - for regular, everyday people
This blog contains affiliate links. When you make a purchase from one of my links (which I hope you do), I receive a small commission, which helps me keep doing this work. To learn more about my use of affiliate links, please click here.
I’m going to let you in on a little secret - your commute doesn’t have to be a drag! It’s true - you can actually enjoy the time you spend going to and from work, school, or wherever! The secret - go by bicycle!
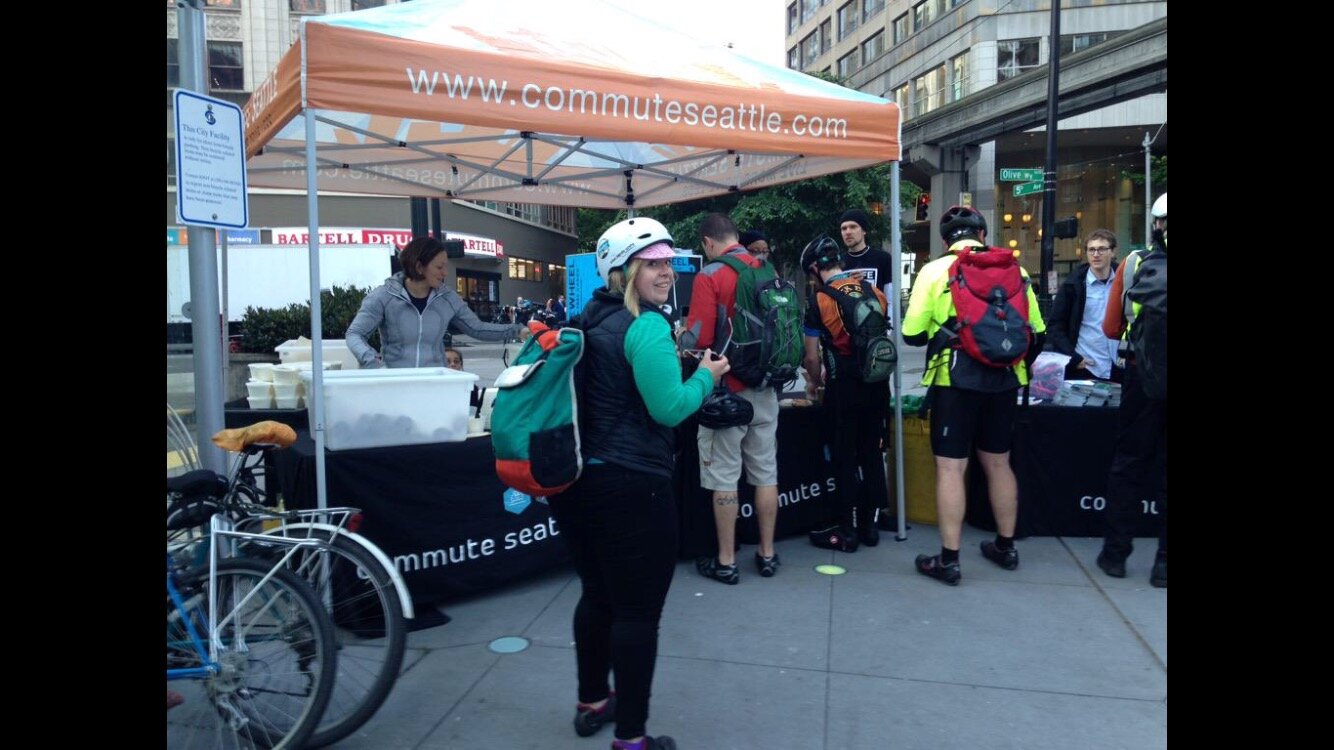
Marley in 2015
A blast from the past from Marley’s early days of commuting by bike.
I’m hoping by sharing my experience as a reluctant and admittedly often very lazy bike commuter, I can convince some of you to give it a try. And no, you don’t need to be in shape, wear anything special, or ride a fancy bike! Everyone can bike commute - even you!
“Middle-aged workers, in particular, especially benefitted from active commuting. Walkers and bike commuters between the ages of 35 and 54 had better self-reported work performance in the study than their peers who were stuck behind the wheel or took public transportation.”
I started bike commuting a few years ago when I realized it was taking me 45 minutes to ride the bus 3 miles downhill (told you I was lazy.) I realized that I could get to work quicker on a bike, have fun in the process, and get my blood flowing - all definite wins in my book.

lock your bike
No matter how secure your building’s parking is, a strong lock is essential. At my work, people clearly left them there. Don’t do this. It’s obnoxious.
After lots of trial and error, here’s my best advice for a successful bike commute.
Prep the night before.
Lay out your riding clothes, lights, shoes, gloves and jacket. Prepare your breakfast, pack your lunch and work bag, charge your lights. Whatever you need to do in the morning, do as much of it the night before as possible that way when your alarm goes off, all you need to do is get dressed, eat and hop on your bike! Trust me, it’s a lot harder to find your helmet at 6am than you might think.
Stash work shoes, toiletries, and a towel at work (if you can.)
If you’re lucky enough to have a locker room or spot to change clothes at work, I highly recommend leaving as many of your toiletries (or getting a duplicate set) there as possible. No need to carry deodorant, a hair dryer and a towel back and forth every day! At my last company, we had a communal hair dryer and straightening iron for everyone to use, which was a total life saver.
I also kept a stash of socks, underwear, a cardigan and shoes at work, because I would inevitably forget at least one of these crucial items most days. These lived in a desk drawer and saved my butt more than once.
Gear up properly.
Not to be “that” person who says you need all the fancy gear, but there definitely is some gear you’re going to want for a comfortable commute- especially if you live in a place where it rains or is dark during your ride.
The Bike: Any bike will work - honestly. For the most comfortable experience, I’d go towards a hybrid/all-road bicycle as they’re pretty dang durable. Something that can withstand potholes, rain, and lots of miles.
If you’re lucky enough to live in a city with a bike share, that’s a great way to test out the waters of bike commuting! More on that in a future post.
Electric bikes are another excellent option if they’re in your budget! Ranging from $999 for the RadMission to over $10,000 - the sky is the limit on how much you could spend on an e-bike (but you don’t have to!) Definitely a future post all about why I love e-bikes so much too!
Rack & Panniers to carry your gear: Yes, you can use a backpack, but I like having my bike carry my stuff. My go-to is the Ortlieb Classic Backroll Panniers - they’re waterproof, durable and big enough to carry lots of stuff. If you want something a bit cuter, Po Campo makes great bags that transition seamlesslesly from the bike to the office.
As for racks, it’s hard to make a specific recommendation as you have to make sure it fits your bike. Chat with your local trusted bike shop and give them your business. If you don’t have anywhere to bolt on a rack, this rack that attaches to your seat post and seat stays is a cool option though. Do NOT use this if you have a carbon frame!!
Lights: Let’s face it, winter is coming. For those of us in the northern hemisphere, it’s likely we will be commuting in the dark. Being able to see (and being seen) is crucial for a safe commute. Pick a light that’s in your budget - honestly I’ve tried a bunch and they’re all pretty good. I highly recommend rechargeable lights - take them into your office during the day and charge them and you’ll never be out of juice!
Fenders: Don’t be that person who sprays everyone behind you with gross water. Put fenders on your bike and keep yourself and those behind you dry. Bonus - it’ll keep your bike cleaner. (Make sure you get the proper size fenders for your tires!)
Lock: No matter where you’re parking your bike (unless it’s literally at your desk), you need a strong lock. I recommend a U-lock that can secure your front wheel, especially if you have quick-release style wheels.
Do a Test Ride before you need to be at work on time!
If you’re not already riding bikes on the regular, you might not have any concept of how long it’ll take you to get to work on your bike. This is ok!
Do a test ride on the weekend to gauge how long the ride will take and how your body feels doing it. Make it super realistic by loading up your bags, putting them on your bike and riding with them! Nobody wants to be surprised by an extra complication when they’re in a rush. Also, keep in mind that traffic patterns might vary from the weekend to a weekday.
Be realistic about the mileage - consider making your commute multimodal.
I realistically won’t ride more than 5-10 miles for a bike commute. And I ride a lot of miles when I want to. Be honest with yourself about how far you are willing to ride and use transit to help reduce the distance if you need. Most cities allow bikes to be loaded onto buses and trains.
One idea - take transit to work and ride your bike home when there might be less of a time crunch.
Find a mentor or buddy to ride with.
Ask around at work, in your local neighborhood Facebook group, or among your friends group. Perhaps there is an experienced rider who is traveling the same direction as you? Most cyclists are pretty friendly and excited to have more folks joining us on the road, so I’d encourage you to ask if they’d let you join on their commute. Having a seasoned rider lead you can help you gain confidence, learn tricks (or route tips) you might not otherwise know and provide extra visibility.

Bikes on the train
Don’t worry, this was pre-COVID.
Best of luck out there and more to come on this topic, including How to Bike Commute with a Laptop, How to Bike Commute and Not Get Sweaty, and How to Bike Commute in Dress Clothes!